
The sub-2 pound kitchen philosophy
Ultralight backpacking isn’t about suffering; it’s about freedom. For a solo hiker, every ounce counts. It impacts your energy levels, your speed, and ultimately, how much you enjoy the experience. I learned this the hard way on a trip through the High Sierra. I overpacked, thinking I needed every possible convenience, and ended up miserable by day two, weighed down by unnecessary gear. That trip fundamentally changed how I approach packing.
A sub-two-pound kitchen is a practical target that forces you to be honest about your needs. You don't have to starve or eat cold beans, but you do have to prioritize weight over convenience. I aim for a setup that handles the basics perfectly without adding bulk.
There are trade-offs, of course. You won’t be making gourmet meals. But you can enjoy hot, nourishing food after a long day on the trail. This guide focuses on the essentials – the items that will reliably provide you with hot water and the ability to prepare simple, satisfying meals. It’s about maximizing enjoyment while minimizing burden.
Choosing a stove
Your stove is the most important choice. Canister stoves like the MSR PocketRocket 2 are simple and boil water fast. The downside is the bulky fuel canisters, which are hard to find in small trail towns.
Alcohol stoves, such as the Trangia Spirit Burner, are lightweight and use readily available fuel (denatured alcohol). They are very reliable, but they’re notoriously slow to boil water and offer limited simmer control. The flame can also be difficult to see in bright sunlight. Solid fuel stoves, like those from Esbit, are the lightest option, but they produce a small flame and aren't ideal for cooking anything beyond boiling water.
Integrated stove systems, like the Jetboil Flash, are efficient and fast, but they typically weigh more than a minimalist setup allows. While convenient, they often push past the 2-pound limit when you factor in other kitchen components. For a truly ultralight setup, I usually recommend a canister stove for its balance of weight, performance, and ease of use. However, if you’re going somewhere with restricted air travel or limited fuel availability, an alcohol stove is a solid alternative.
Consider the conditions you’ll be facing. Canister stoves can struggle in cold weather as the fuel pressure drops. Alcohol stoves are less affected by temperature, but take longer to boil water in any condition.
Cookware and pots
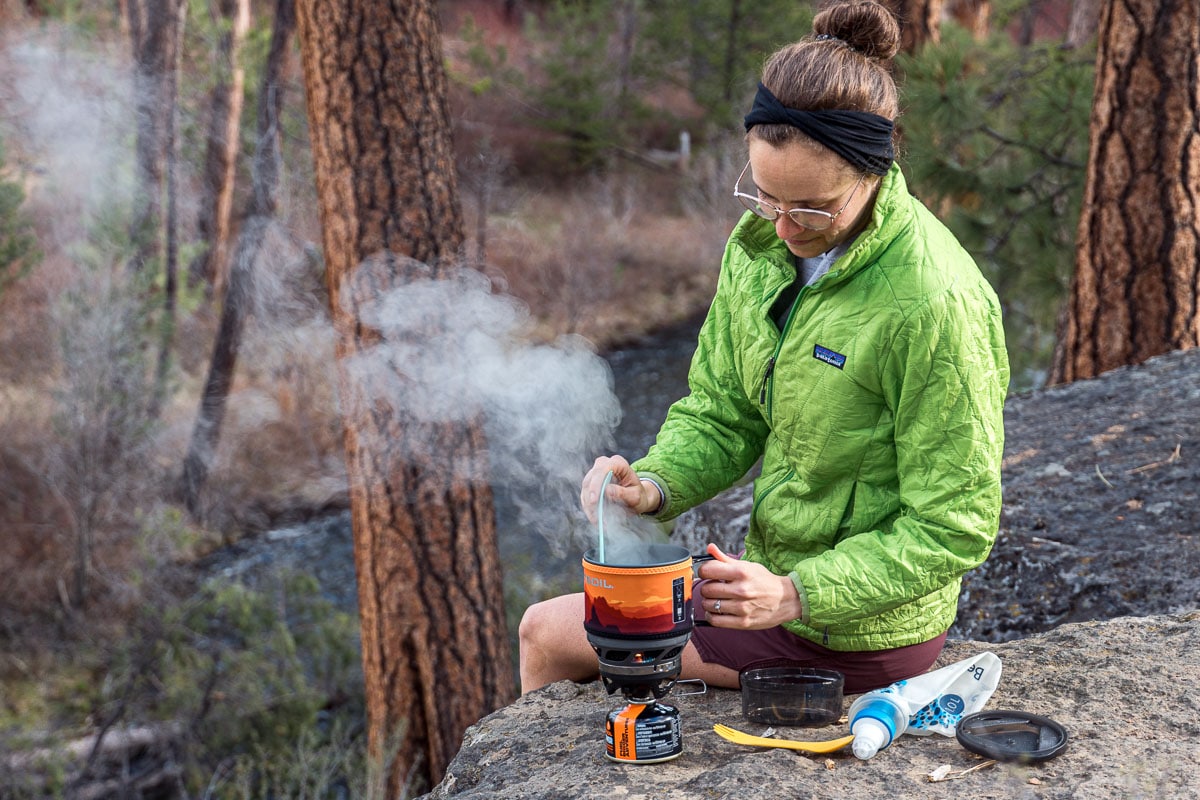
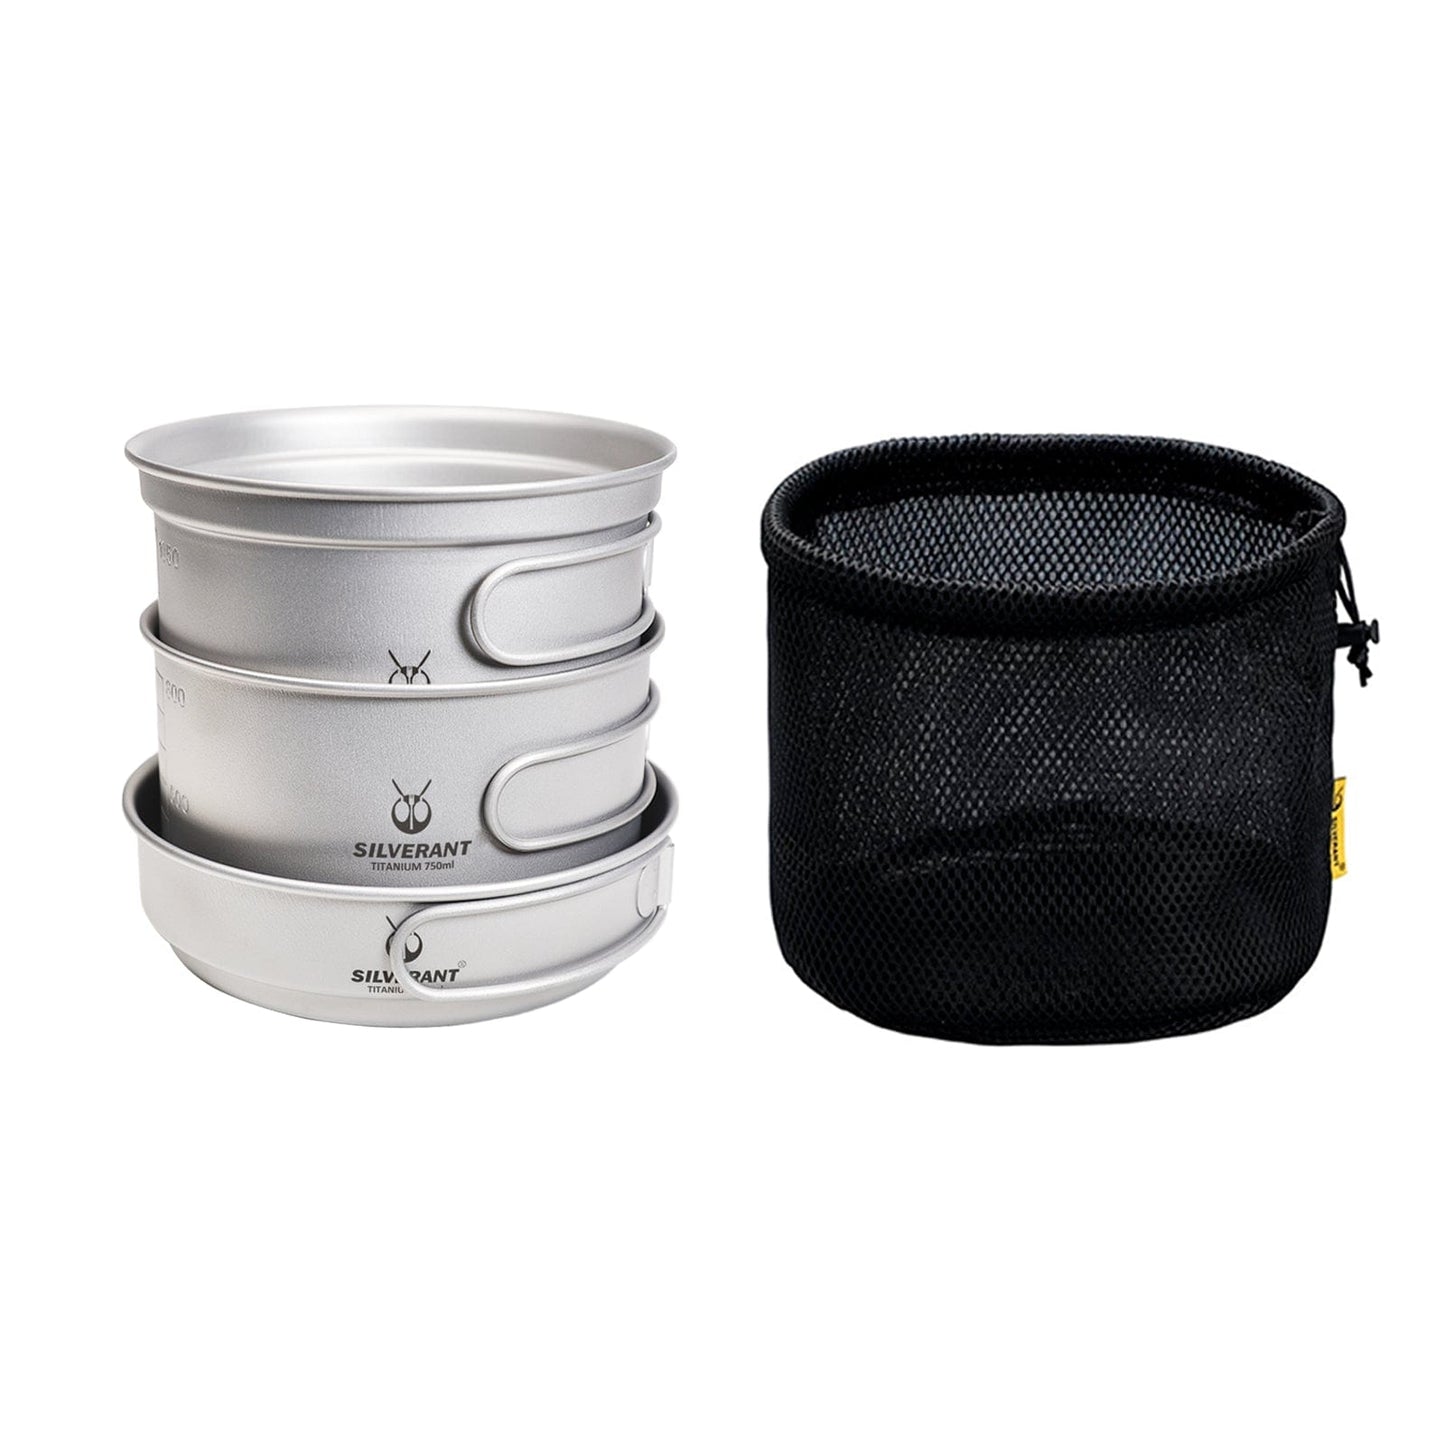
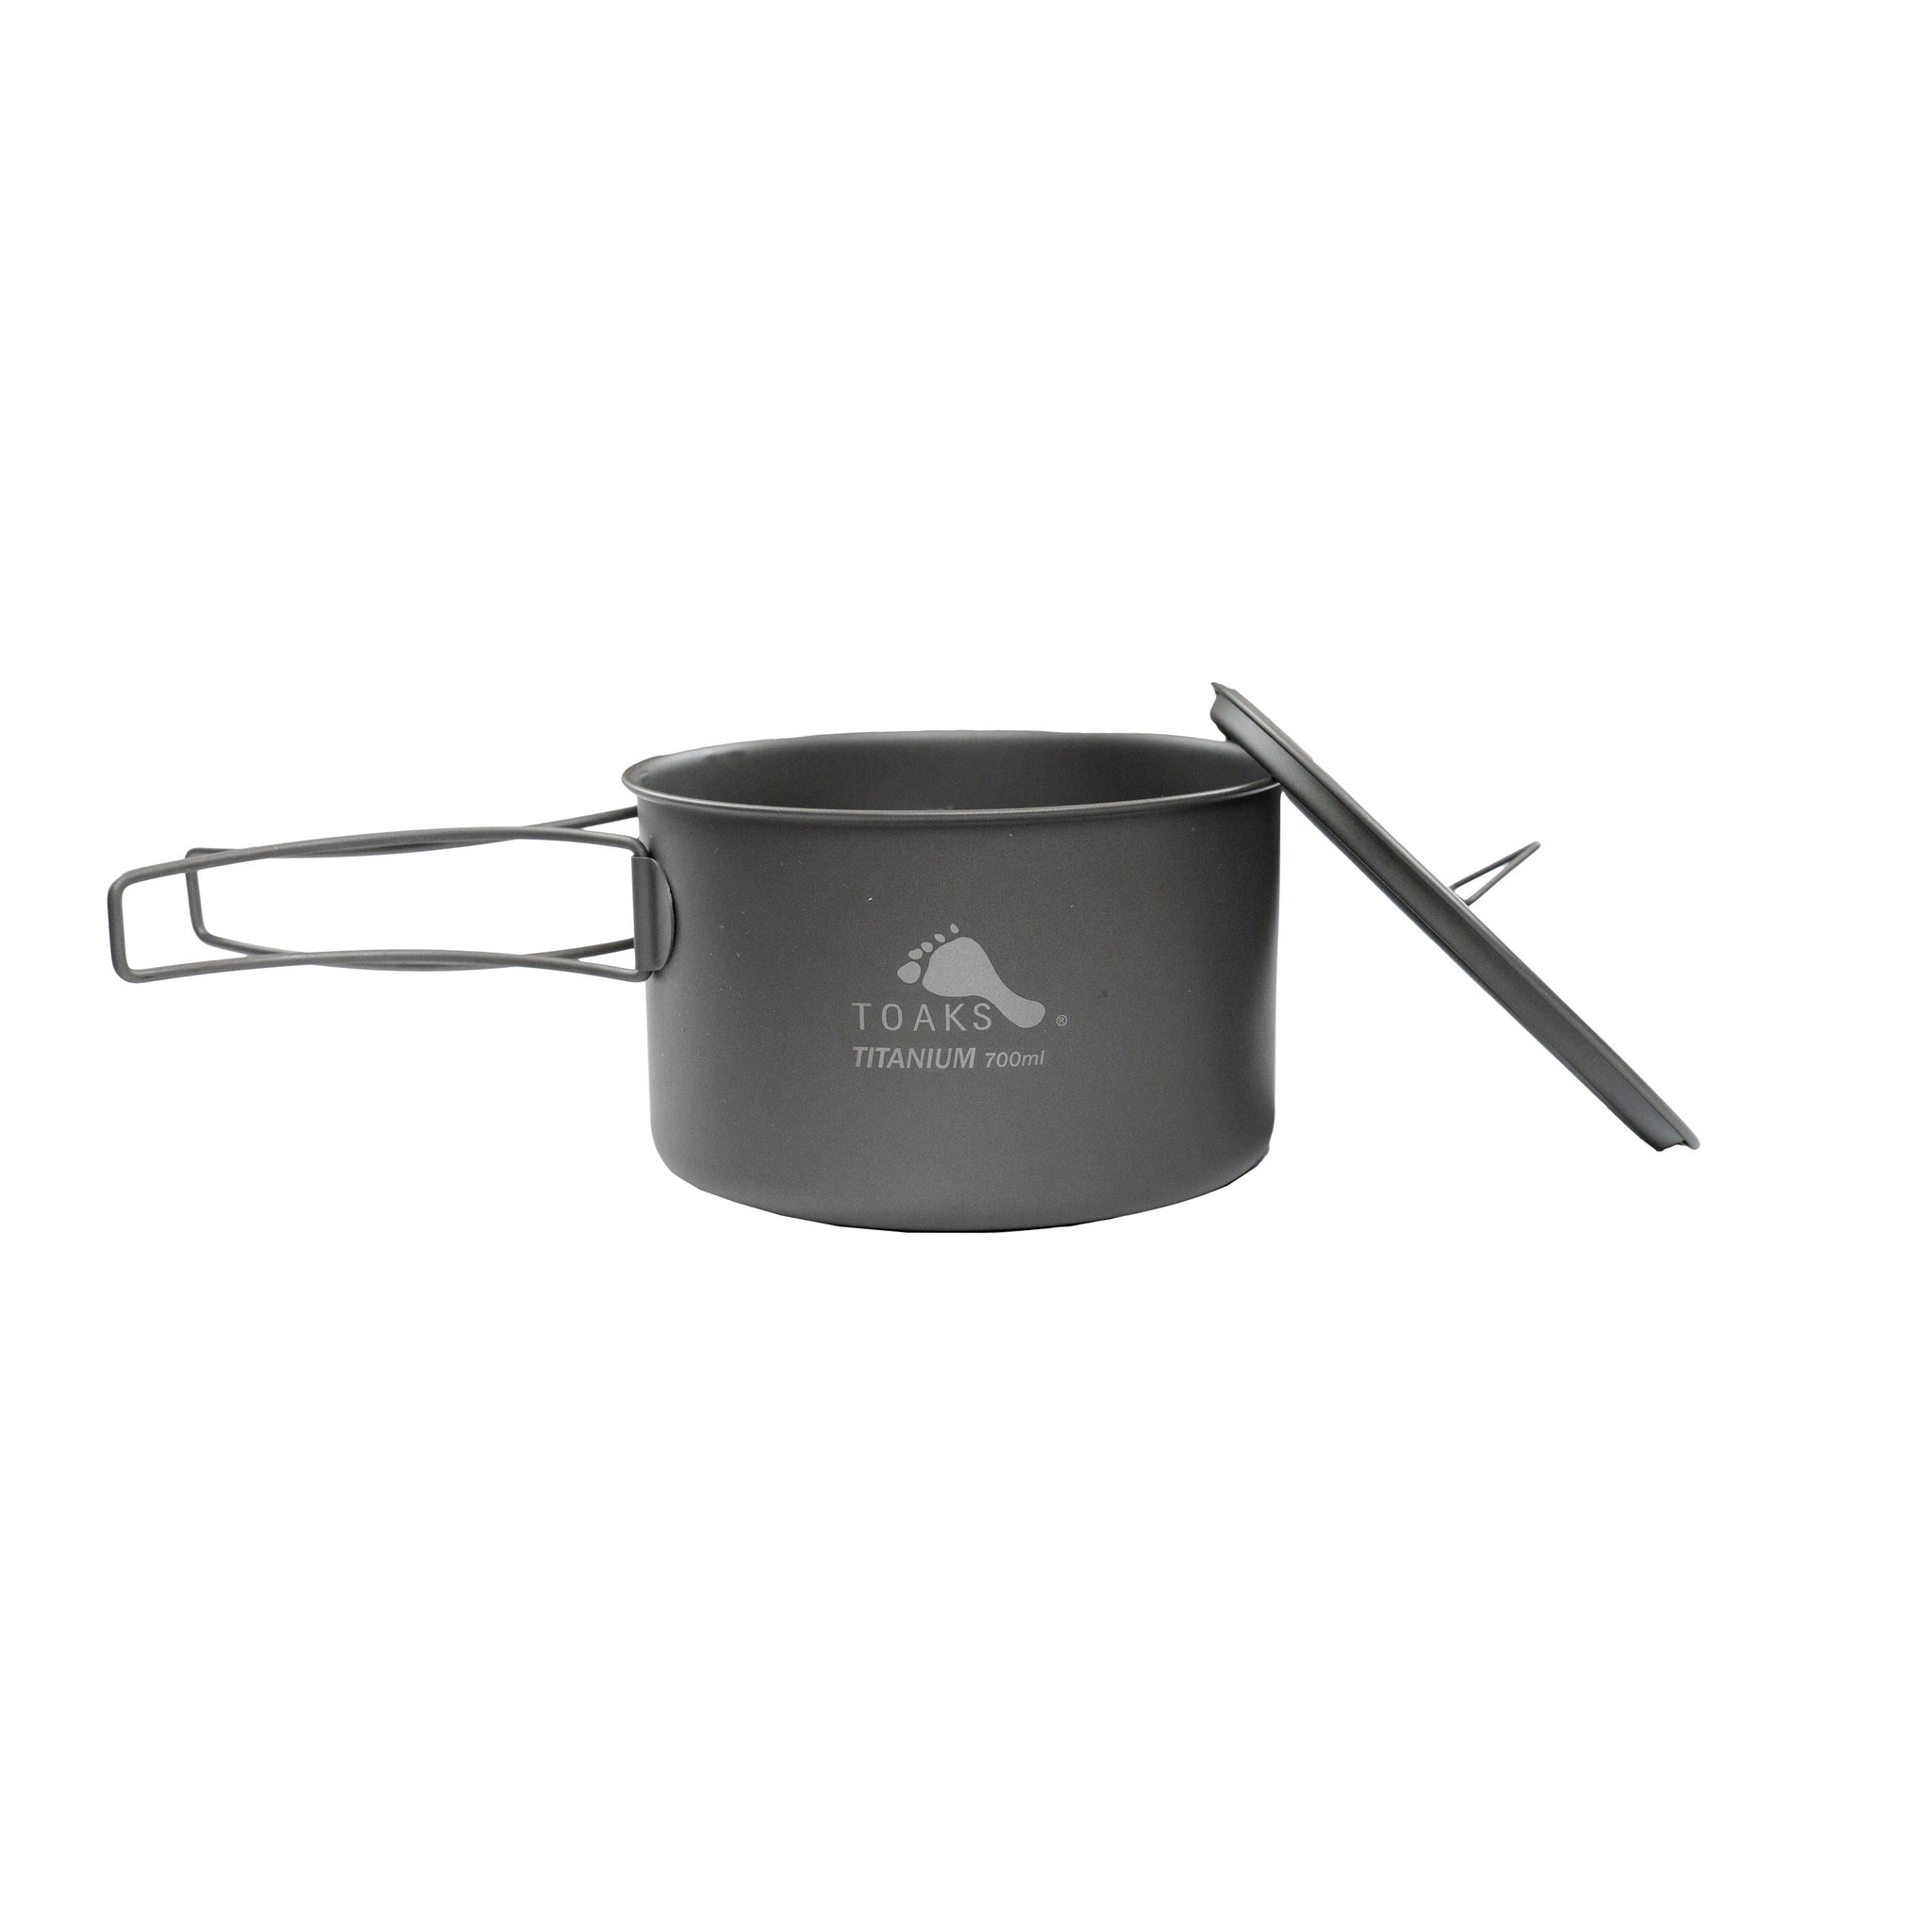
Titanium is the standard for a reason. It is light and takes a beating. For solo trips, a 750ml pot is usually enough for a dehydrated meal and a coffee. I use Toaks pots because they are cheap and don't break.
A lid is essential. It significantly reduces boiling time and conserves fuel. It also provides a stable surface for resting your spork. Some pots come with lids, while others require you to purchase them separately. A small, foldable frying pan can be nice for more elaborate meals, but it adds weight and bulk that many minimalist hikers are unwilling to carry.
Non-stick coatings are available on some titanium cookware, but their durability is a concern. They can scratch and wear over time, rendering them ineffective. I generally prefer the simplicity and longevity of bare titanium. It requires a bit more effort to clean, but it’s a more reliable long-term solution. Don't expect a perfectly non-stick surface even when new.
Utensils: The Spork and Its Friends
The spork reigns supreme in the world of ultralight backpacking. It’s a fork and a spoon in one, saving you valuable weight and space. Titanium sporks are the most durable, but plastic sporks are lighter and cheaper. A long-handled spoon can be useful for reaching the bottom of freeze-dried meal pouches, but it’s often redundant if you already have a spork.
A small folding knife or a dedicated knife/spoon combo is also a good idea. It’s useful for cutting food packaging, preparing snacks, or spreading peanut butter. I've never understood the need for a full set of cutlery on a backpacking trip. It’s unnecessary weight for minimal benefit. A single, multi-purpose utensil is almost always sufficient.
Consider the shape of the spork. Some are designed with deeper bowls for easier scooping, while others have more pronounced tines for better forking. Choose one that feels comfortable in your hand and suits your eating style.
- Titanium sporks are durable but add a few extra grams.
- Plastic sporks are the lightest and cheapest option.
- Long-handled spoons help you eat out of bags without getting food on your knuckles.
- Folding Knife/Combo: Versatile for food prep.
Fuel & Fire Starters: Reliability First
Fuel is a significant weight contributor. For canister stoves, choose the smallest canister size that will meet your needs. Estimate your fuel consumption based on the duration of your trip and the amount of cooking you plan to do. A general rule of thumb is that one 8oz canister will last a solo hiker 3-5 days, but this varies greatly depending on usage.
Always carry a backup fuel source, especially on longer trips. An alcohol stove or a set of solid fuel tablets can be a lifesaver if your canister runs empty. For fire starters, a lighter is the most convenient option, but it can fail in cold or wet conditions. Waterproof matches are a reliable backup. I personally prefer cotton balls soaked in petroleum jelly – they light easily and burn for a surprisingly long time.
Wind kills stove efficiency. A small foil windscreen saves fuel and time when it's breezy. If your stove doesn't have one built-in, a piece of heavy-duty aluminum foil works fine.
Food storage and cleanup
Responsible hiking includes proper food storage and waste disposal. If you’re hiking in bear country, a bear canister is often required. Even if it isn’t required, consider using an odor-proof bag to minimize the risk of attracting animals. If bear canisters aren’t necessary, learn how to properly hang a bear bag to keep your food safe.
Cleanup should be minimal and environmentally friendly. Biodegradable soap and a small sponge are all you need to wash your cookware. Remember to carry out all trash, including food scraps. Water weight is a major factor, so plan your water sources carefully. Knowing where you can reliably refill your water bottles will save you from carrying unnecessary weight.
The principles of Leave No Trace are paramount. Pack out everything you pack in, minimize your impact on the environment, and respect wildlife. A minimalist kitchen makes it easier to adhere to these principles, as you have less stuff to potentially leave behind.
Recommended ultralight systems
Putting it all together, a few systems really shine for solo hikers prioritizing a sub-2 pound kitchen. The BRS-3000T stove is incredibly popular – it's tiny, lightweight, and surprisingly powerful. Paired with a Toaks 750ml titanium pot and a titanium spork, you're looking at around 12-14 ounces for the entire setup.
Another excellent option is the Soto Amicus stove, known for its stable base and consistent flame. Combine it with a small titanium mug (which can double as a pot for boiling water) and a titanium spork, and you have a versatile and lightweight kitchen system. This setup will likely weigh around 16-18 ounces.
These are just examples, of course. The best system for you will depend on your individual needs and preferences. But both of these options demonstrate that it’s possible to have a fully functional, ultralight backpacking kitchen without sacrificing too much convenience.
High Altitude Cooking: A Few Adjustments
Cooking at altitude requires a few adjustments. Water boils at a lower temperature, meaning cooking times will increase. You may need to simmer food for longer to ensure it’s thoroughly cooked. Also, consider increasing your fuel consumption slightly to compensate for the lower boiling point.
Staying hydrated is even more important at altitude. Drink plenty of water throughout the day. Altitude sickness can also affect your appetite, so it’s important to force yourself to eat even if you don’t feel hungry. I once underestimated the impact of altitude on cooking time and ended up with undercooked rice on a trip to the Rockies. It wasn’t a pleasant experience.
Be prepared for colder temperatures at higher elevations. This can affect stove performance and increase fuel consumption. A windscreen is even more important at altitude. Packing extra fuel is a good idea, just in case.


No comments yet. Be the first to share your thoughts!